

Last Updated: November 12, 2026
Quick Summary
To make a two tone frosting swirl, load each color into its own small piping bag, then nest both bags side by side inside one large bag fitted with a star tip. Pipe a steady spiral with even pressure, keeping both bag openings level so neither color dominates the swirl.
- Split one batch of buttercream evenly and tint each half separately with gel food coloring.
- Cut both small bag tips to the same length so the colors share the opening evenly.
- Hold the bag straight above the cupcake and spiral from the outer edge to the center.
- Chill a filled bag for ten minutes if the colors start bleeding together.
- Use a wide, deep-toothed star tip like a 2D to keep color bands crisp.
Table of Contents
- What You'll Need for a Two Tone Frosting Swirl
- How to Make Two Colored Buttercream Frosting
- Building Your Two-Tone Icing Bag
- How to Swirl 2 Colors of Frosting on Cupcakes
- How to Swirl 3 Colors of Frosting
- Choosing a Piping Tip for Clean Color Bands
- Troubleshooting Muddy Colors and Uneven Swirls
- Stock Your Kit at Jane's Cake and Baking Supply
- Frequently Asked Questions
What You'll Need for a Two Tone Frosting Swirl
A clean two tone frosting swirl starts with the right gear and frosting that holds its shape. The setup matters more than most guides admit.
Here is what you need before you pipe a single swirl:
- Two frosting colors in the same buttercream recipe
- Gel food coloring for deep color without thinning the frosting
- One large piping bag for the outer bag
- Two small piping bags or disposable bags for each color
- A star tip, such as a 2D tip, plus a coupler
- A tall glass to hold the bag while you fill it
- An offset spatula for striping and smoothing
- Baked, fully cooled cupcakes
Watch out: warm frosting can cause muddy color bands. Let your buttercream sit at room temperature until it pipes smoothly but still holds a peak.
How to Make Two Colored Buttercream Frosting
Two colored buttercream frosting is one base recipe split into two bowls and tinted separately. Mix a full batch of your favorite buttercream, divide it evenly, then color each half.
A common approach is to start with a small amount of gel color on a toothpick. Gel paste is stronger than liquid drops, so you get vivid color without watering down the frosting consistency.
For a true red or deep black, mix the color in and let it sit for a few minutes. The shade deepens as it rests.
Keep both bowls covered with a damp towel while you work. Buttercream crusts fast, and a dry crust creates lumps that clog the tip opening.
If you want a softer pastel pair, tint one bowl lightly and leave the second bowl white frosting. White next to any color gives high contrast with almost no effort.
Our soft gel paste colors make it easy to mix matching shades for a two-color swirl, and a little goes a long way.
Building Your Two-Tone Icing Bag
A two-tone icing bag is built by loading each color into its own small bag, then nesting both inside one large piping bag fitted with a star tip. This two-bag method keeps the colors side by side instead of blended.
Here is the sequence we use in class:
- Fit the star tip and coupler onto the large bag.
- Fill each small bag with one color, then twist and secure the tops.
- Cut the tip off both small bags, about half an inch up.
- Place both small bags side by side inside the large bag.
- Press them down so both openings sit snug against the coupler.
- Twist the top of the large bag and apply even pressure.
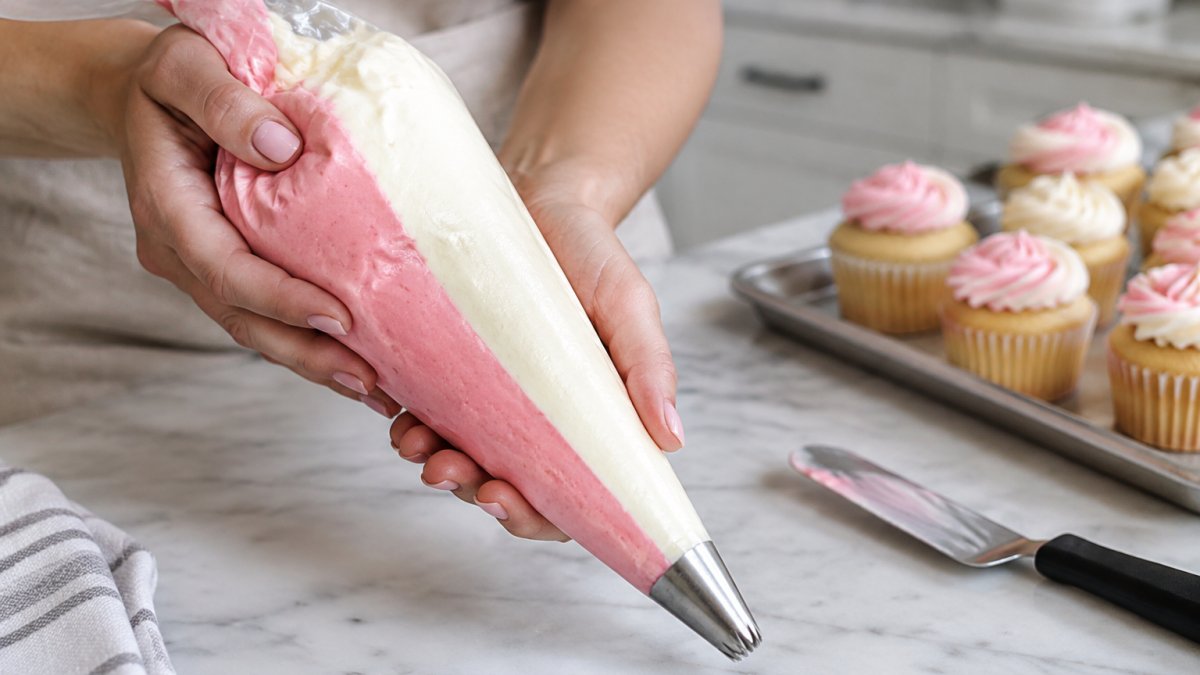
The thing nobody tells you about this method is bag placement. If one small bag sits higher than the other, that color dominates every swirl. Line up the two tip openings before you twist.
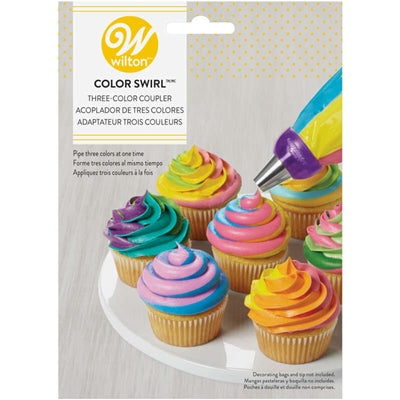
A three-color coupler does the same job for three shades and holds the bags in place while you pipe.
How to Swirl 2 Colors of Frosting on Cupcakes
To swirl 2 colors of frosting on cupcakes, hold the bag straight above the cupcake and pipe a steady spiral from the outer edge to the center. Stop pressure, then lift straight up.
Keep the tip opening just above the surface. Too high and the swirl collapses. Too low and you smear the liner.
Apply even pressure the whole way around. Uneven pressure is what creates lopsided swirls with one color swallowing the other.
For a classic rosette, start in the center and spiral outward instead. The 2D tip gives you sharp ridges either way.
Finish each cupcake with a quick upward twist of the wrist. That little motion gives you the pointed peak that makes swirled frosting look professional.
Set finished cupcakes on liners and wraps so the swirls stay put during transport.
How to Swirl 3 Colors of Frosting
Three colors follow the same logic as two, with one extra bag and one extra constraint: band spacing. With two colors, each shade gets half the opening. With three, each gets a third, so every decision that affects spacing matters more.
Start by cutting all three small bag tips to exactly the same length. If one bag sits a quarter inch lower than the others, that color takes more than its share of the opening and the other two get squeezed to the edges. Line the three openings up against the coupler before you twist the outer bag, then press the bags down together so all three sit flush.
The Wilton Color Swirl Three-Color Coupler lets you pipe three shades of icing at once. Load each small bag, twist and secure the tops, snip the tips to a matched length, then seat all three into the coupler at once.
Use a wide tip for three colors. A narrow opening crowds the bands and they blur together at the edges, because each color has less room to fold over itself. A 2D or 6B star tip gives each shade its own ridge to ride, which is what keeps three bands visible instead of turning into a muddy stripe.
Color planning matters more with three shades than with two. Keep the colors related in value and hue so they read as one design: pink, white, and a deeper rose work because the shades sit close together and the eye reads them as a gradient. Pink, green, and orange fight each other, and the swirl looks accidental rather than designed. A reliable pattern is one saturated color, one white or cream, and one shade that sits between them, for example, deep rose, white, and soft pink.
A rosette shape shows three colors best. The ridges separate the shades, so each band stays visible, and the spiral motion gives every color a turn at the outer edge. Pipe the same way you would a two-color rosette: start in the center, spiral outward with even pressure, stop pressure, then lift straight up.
Watch out: if one color dominates a three-color swirl, the cause is almost always uneven bag depth rather than uneven pressure, so re-seat the bags against the coupler before you adjust your hand.
Choosing a Piping Tip for Clean Color Bands
Tip choice decides whether your color bands stay crisp or turn muddy, and the reason is mechanical: the tip's opening size and tooth depth control how much the frosting folds over itself as it exits.
Here is how the common shapes compare in practice:
| Tip Style | Opening and Teeth | Swirl Shape | Color Separation | Best For |
|---|---|---|---|---|
| 2D star | Wide opening, deep teeth | Rosette with sharp ridges | Excellent | Two and three color swirls |
| 1M open star | Medium opening, medium teeth | Classic soft swirl | Good | Beginner two-color piping |
| 4B closed star | Medium opening, tight teeth | Tight rosette | Very good | Detailed cupcake tops |
| 1A round | Small round opening | Smooth dome | Poor, colors blend | Single color only |
| 6B open star | Wide opening, deep teeth | Large soft rosette | Very good | Big, bold two-color tops |
Three variables in that table do the real work. First, opening width: a wider opening lets both colors pass side by side without being compressed into one stream. Second, tooth depth: deeper teeth create taller ridges, and taller ridges cast the color boundary into a visible fold rather than a smear. Third, tooth count: more, tighter teeth give a finer rosette but a narrower band of each color, so the shades read as a blend from a few feet away even when they are technically separate.
Match the tip to the swirl shape you want, not the other way around. If you want a tall rosette with clearly visible stripes, reach for a 2D or 6B.
Watch out: a tip that is too narrow for your bag load crowds the color bands and blurs them at the edges, so size the tip to the number of colors you are piping. Two colors tolerate a medium opening; three colors need a wide one.
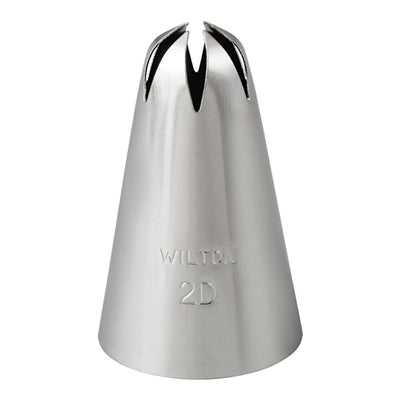
The Wilton 2D decorating tip is a star tip that works with standard decorating bags and a large coupler. Browse our full range of cake decorating bags and tips to match a tip to the swirl shape you have in mind.
Troubleshooting Muddy Colors and Uneven Swirls
Muddy colors almost always come from three causes: frosting that is too warm, bags that sit unevenly, or a tip opening that is too small. Fix the cause, not the swirl.
Run through this checklist when a swirl goes wrong:
- Colors bleeding together? Chill the filled bag for ten minutes.
- One color dominating? Realign both bag openings against the coupler.
- Swirl collapsing? The frosting is too soft, so add a spoon of powdered sugar.
- Frosting skipping and tearing? The frosting is too stiff, so stir in a drop of milk.
- Bands blurred at the edges? Switch to a wider star tip.
- Air pockets in the swirl? Press the filled bag flat and push frosting toward the tip.
Frosting consistency is the variable most bakers skip. Aim for buttercream that holds a firm peak but still spreads with light pressure from a spatula.
Temperature matters just as much. Cold buttercream tears. Warm buttercream slumps. Room temperature is the target for both the frosting and the bag.
Stock Your Kit at Jane's Cake and Baking Supply
The difference between a swirl that looks bakery-made and one that looks homemade usually comes down to tools and technique, not talent. A star tip with real ridges, a coupler that holds your bags straight, and frosting at the right temperature do most of the work.
Jane's Cake and Baking Supply carries the Wilton Color Swirl Three-Color Coupler at $7.99 and the Wilton 9-inch angled spatula at $9.99.
Stop guessing at the grocery aisle and build a kit that pipes clean color bands every time. Order your coupler from Jane's Cake and Baking Supply and pipe your first two tone swirl this weekend.
Frequently Asked Questions
What piping tip is best for a two tone frosting swirl?
The Wilton 2D tip is the standard choice for rosette-style swirls because its open star shape creates deep ridges that keep the two tone frosting colors separated as they pipe. A 1M tip works for taller stacked swirls, and a 1A round tip gives a softer, less defined look. Whichever you pick, use a large coupler so both colors feed evenly into the tip opening.
How do you put two colors of frosting in one piping bag?
Fit your bag with a coupler and tip, then stripe each color down opposite sides of the inside of the bag using a spatula. Fill the center with a third color or more of one shade, twist the top closed, and squeeze a test swirl onto parchment first. The two-tone icing bag method keeps colors in distinct bands rather than blending them into one shade.
Can you make a two-tone frosting swirl with three colors?
Yes. The Wilton Color Swirl Three-Color Coupler at Jane's lets you pipe three shades at once and works with large tips 1M, 1A, 2C, or 4B and 16-inch bags. Load each color into its own section of the coupler, twist to secure, and pipe. Keep the colors high-contrast so the bands stay readable, and wipe the tip between cupcakes to stop colors bleeding.
Why did my frosting colors turn muddy?
Muddy bands usually come from overfilled bags, warm frosting, or too much pressure at the start of a swirl. Chill your filled bag for 10 to 15 minutes, fill it only two-thirds full, and start piping with steady, even pressure. Also check that your colors contrast well; pairing similar shades like pink and red blends visually even when the technique is correct.


